APPI Compliance
The app used for assuring the GDPR, LGPD, CCPA-CPRA, VCDPA, CPA, CTDPA, UCPA, APPI, PIPEDA compliance of this site, collects your IP and the email address in order to process the data. For more check Privacy Policy & Terms of Service
Data Rectification
You can use the link below to update your account data if it is not accurate.
Data Portability
You can use the links below to download all the data we store and use for a better experience in our store.
Access to Personal Data
You can use the link below to request a report which will contain all personal information that we store for you.
Do not Sell My Personal Information to Third Parties
You can submit a request to let us know that you do not agree for your personal information to be collected or sold to a third party.
Right to be Forgotten
Use this option if you want to remove your personal and other data from our store. Keep in mind that this process will delete your account, so you will no longer be able to access or use it anymore .
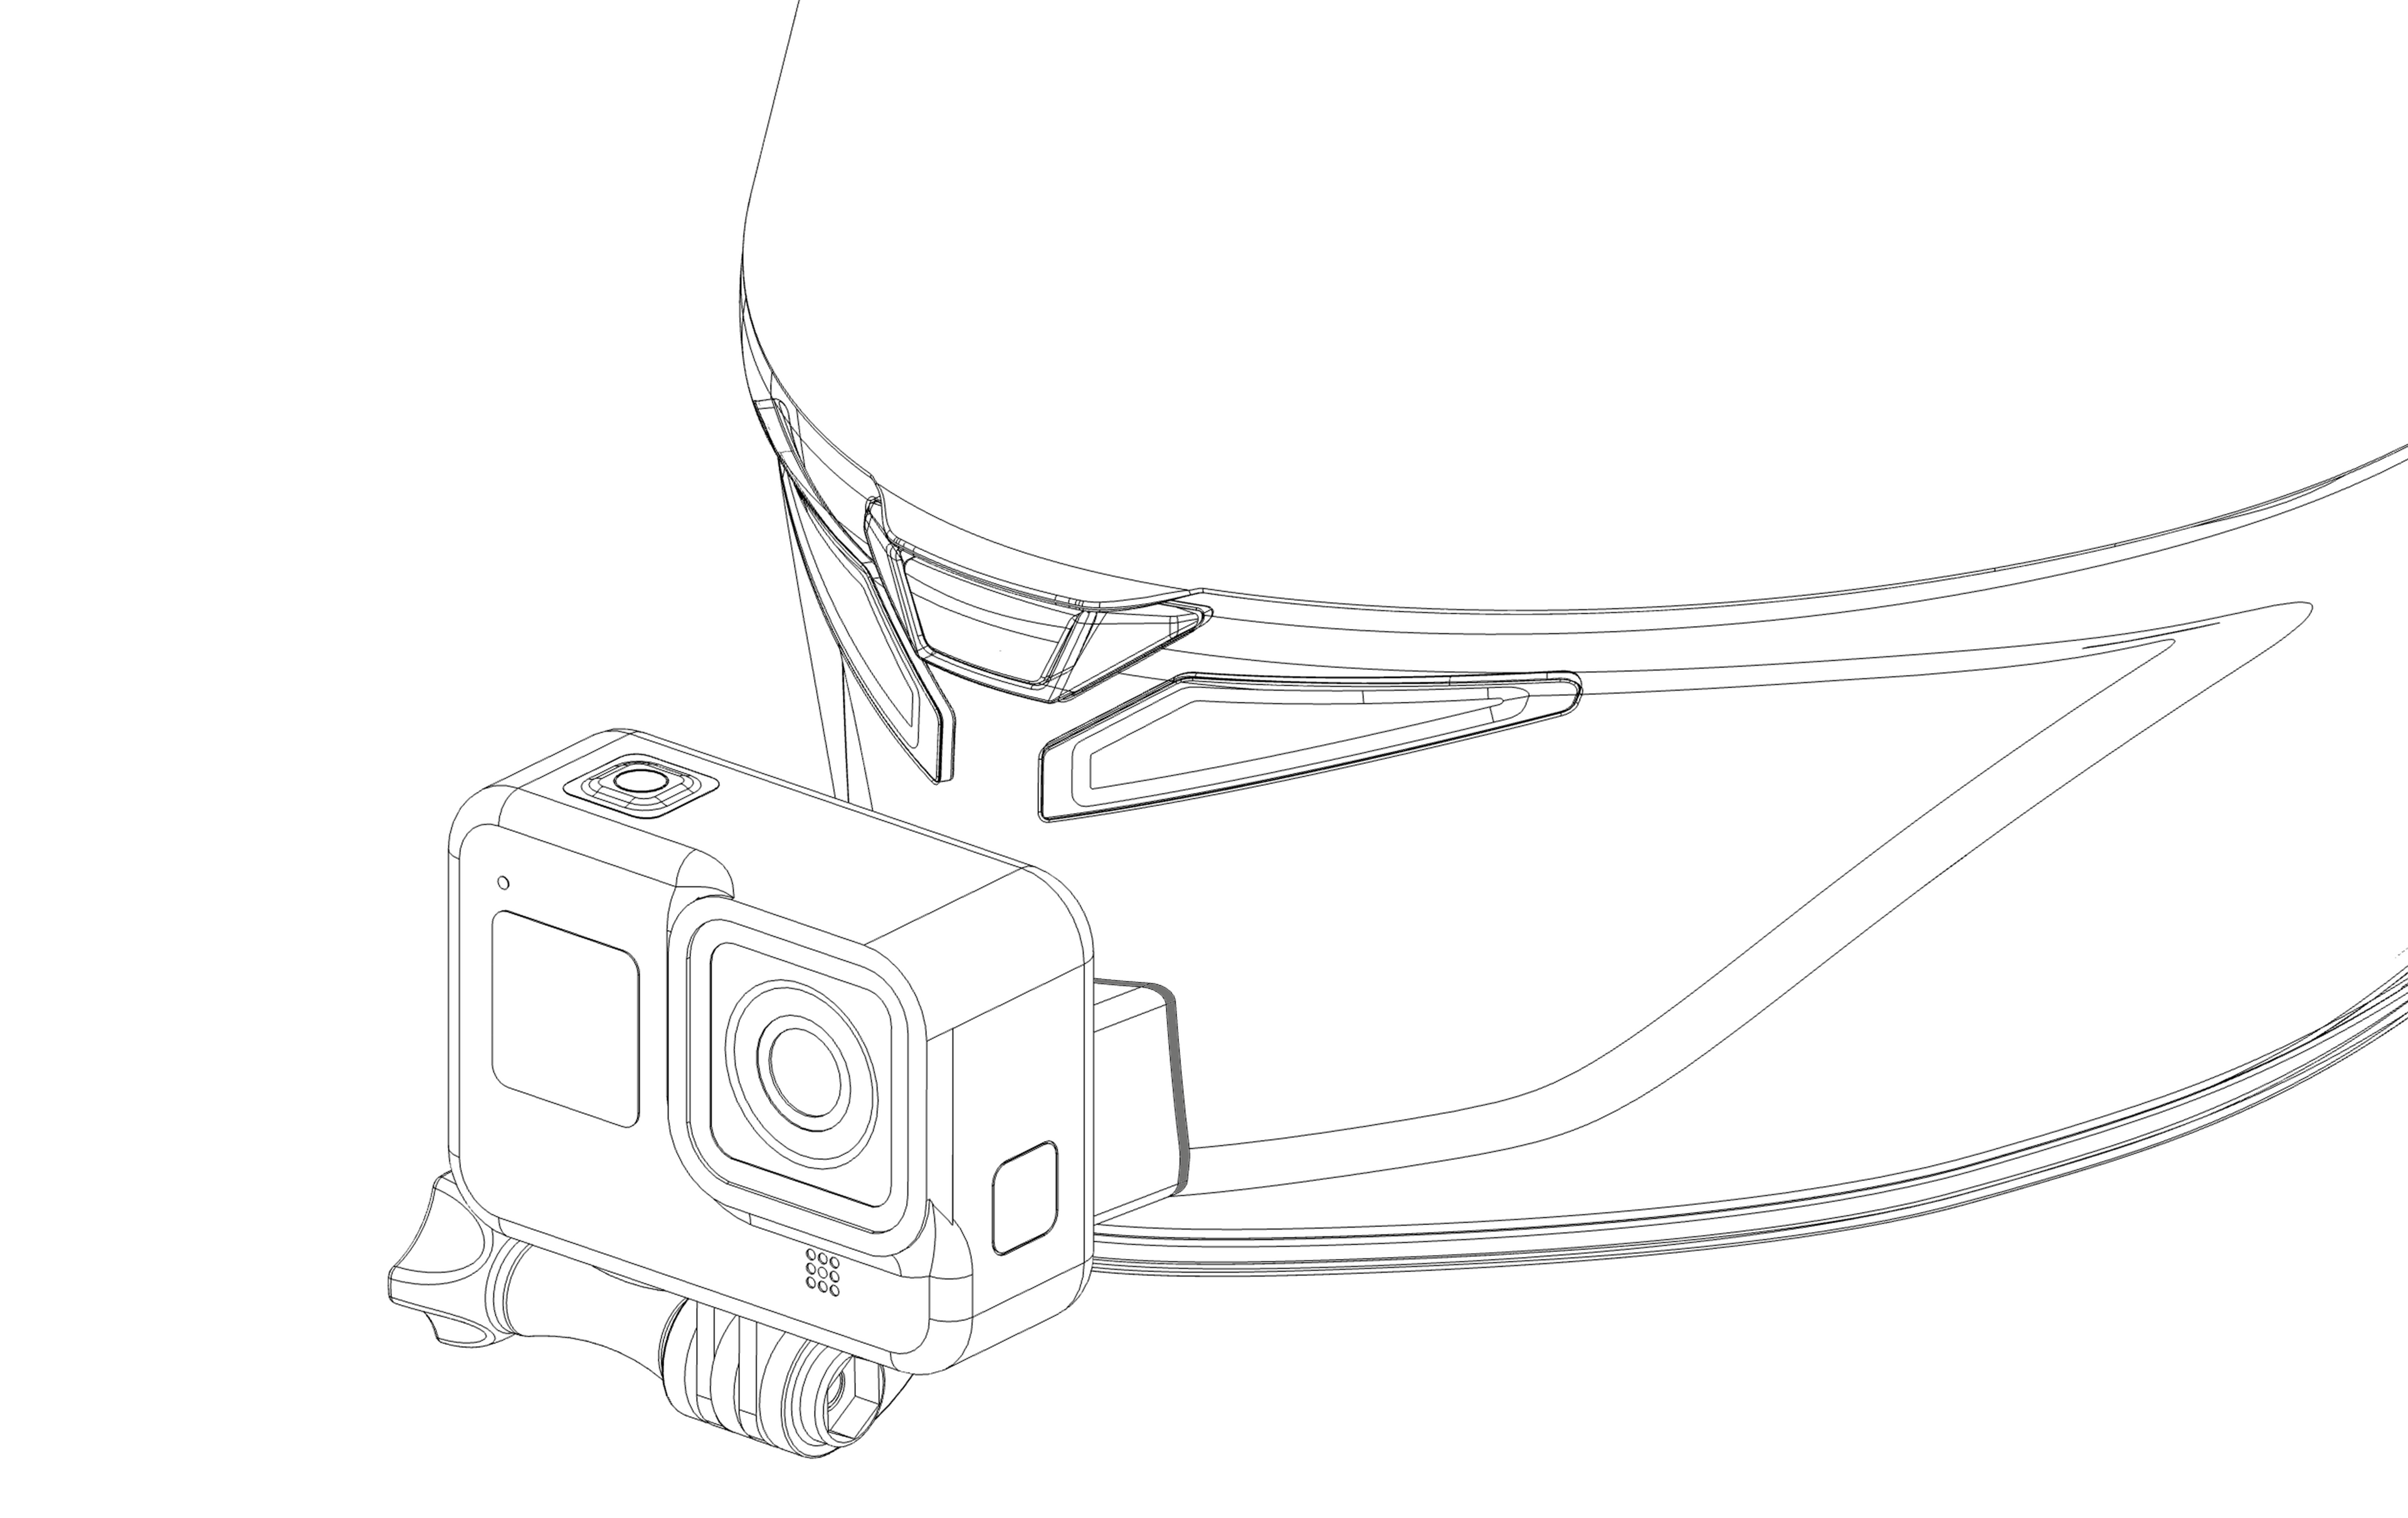
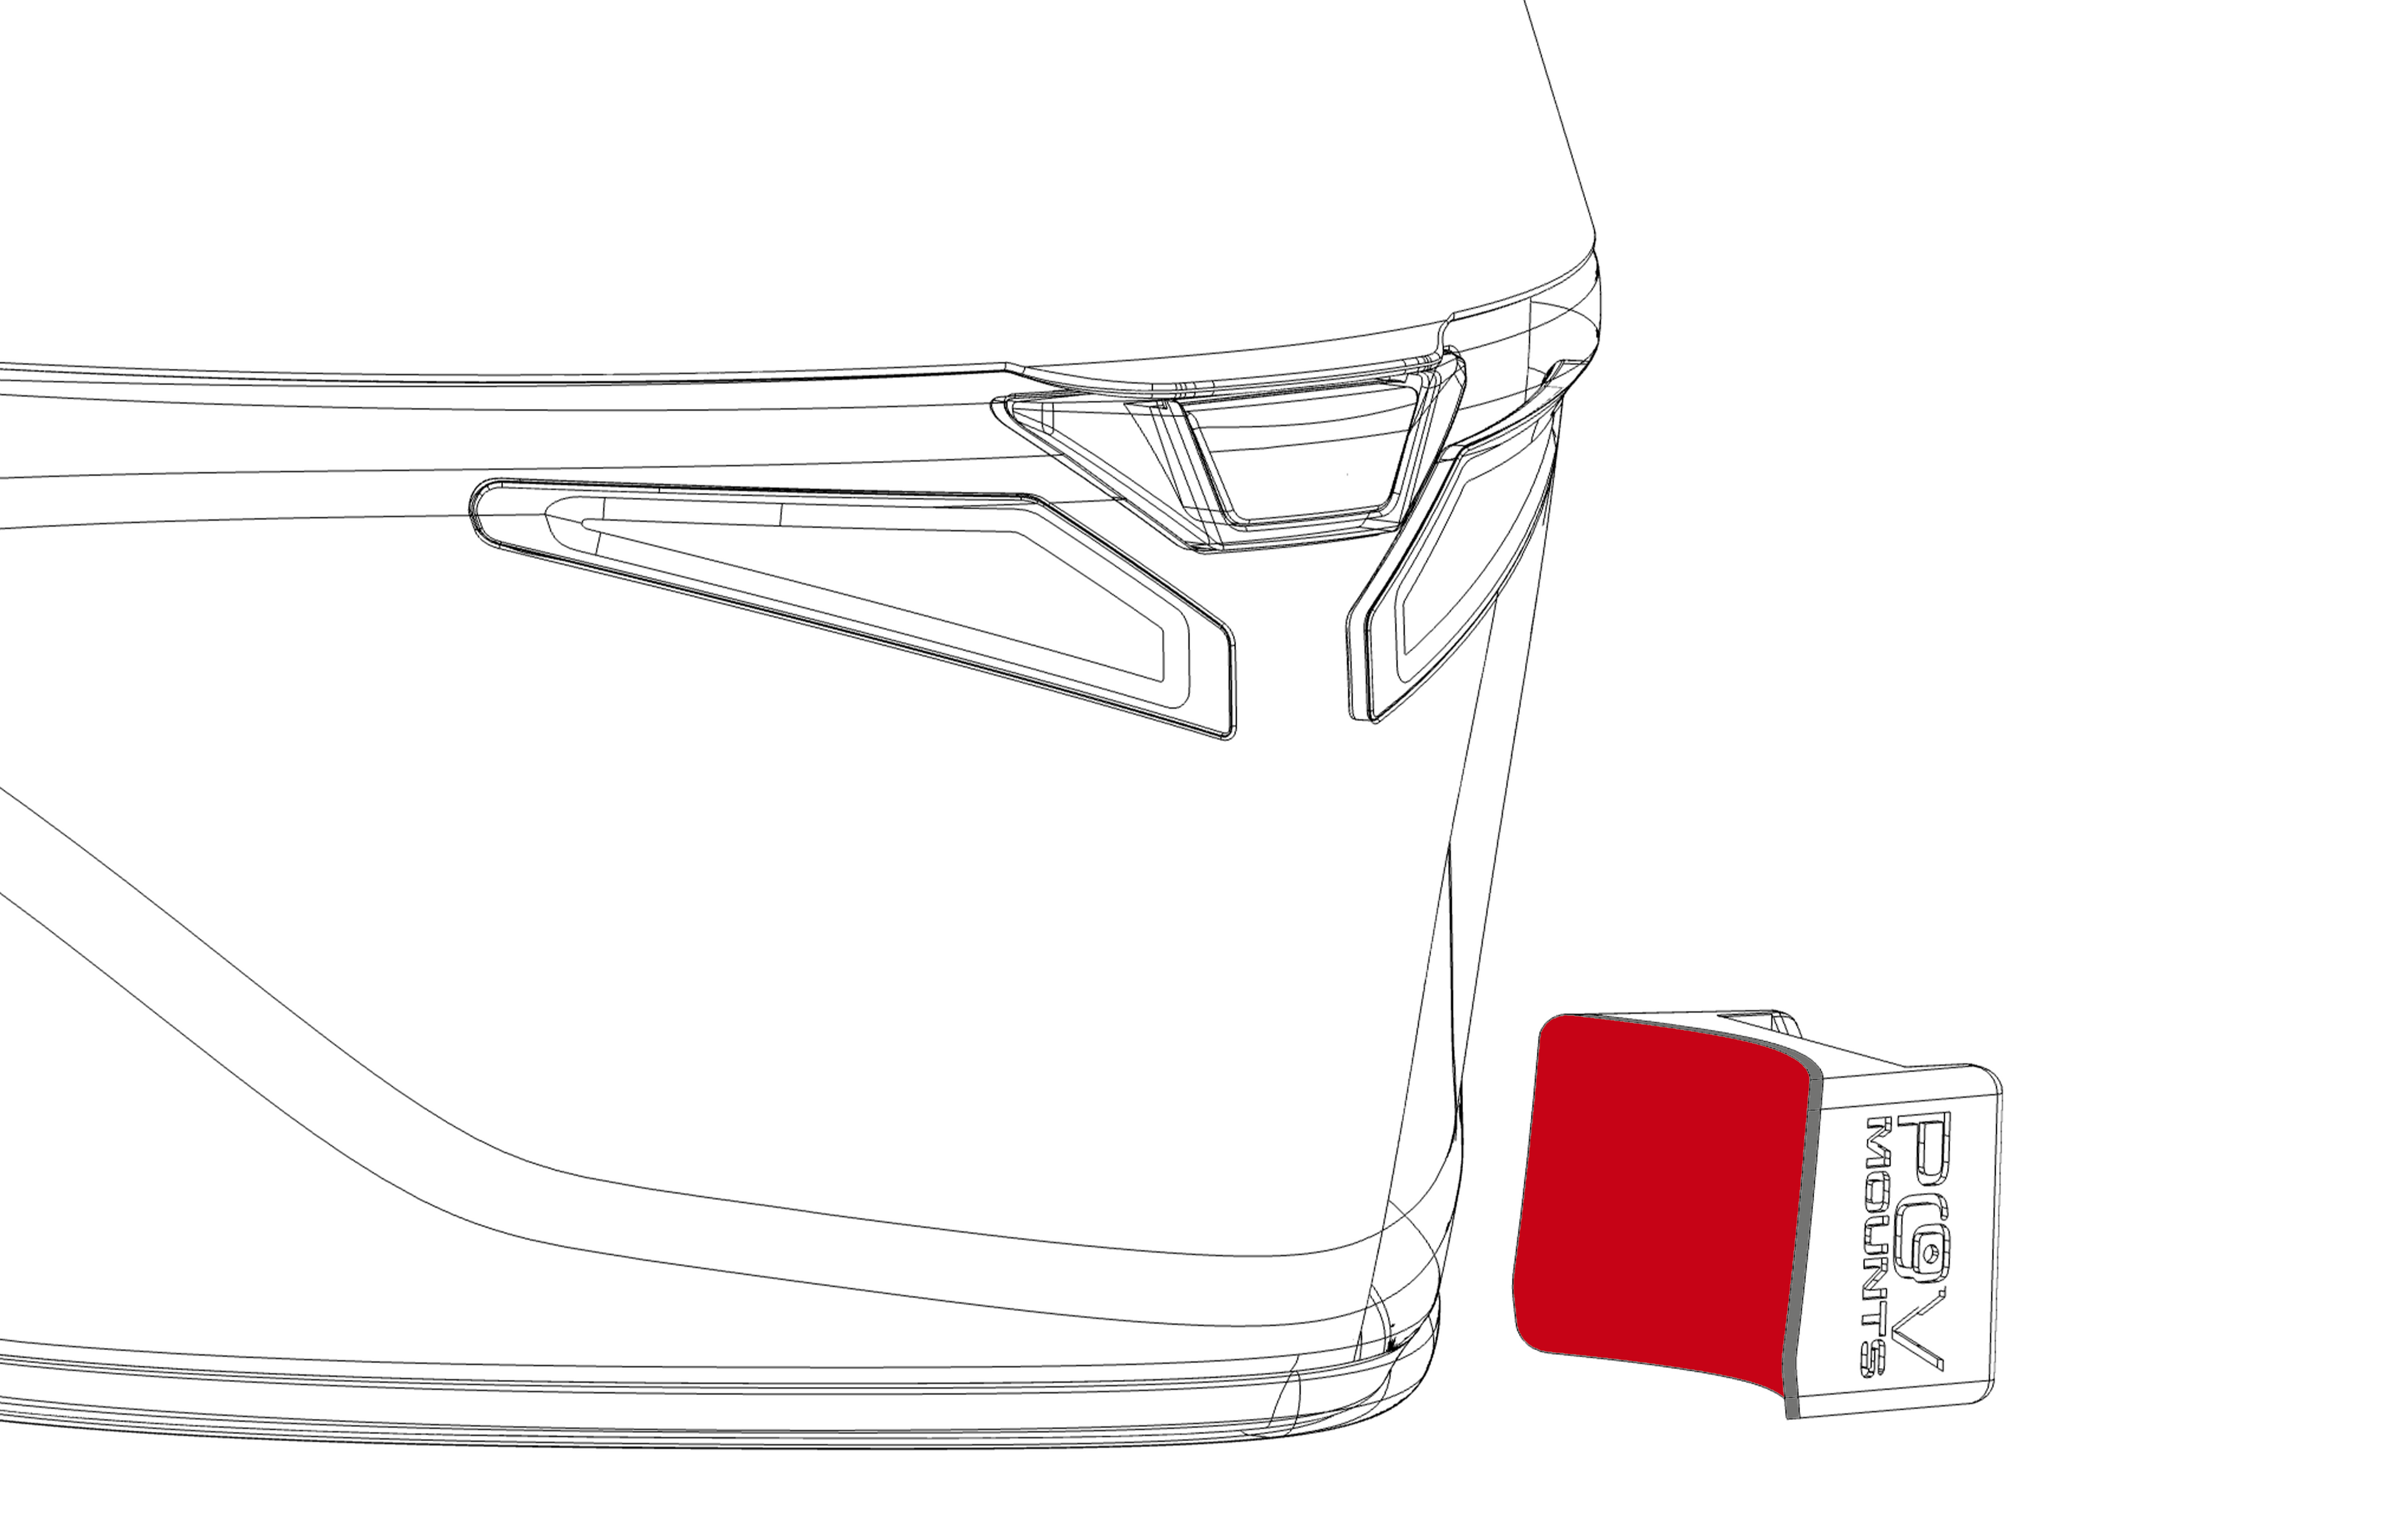
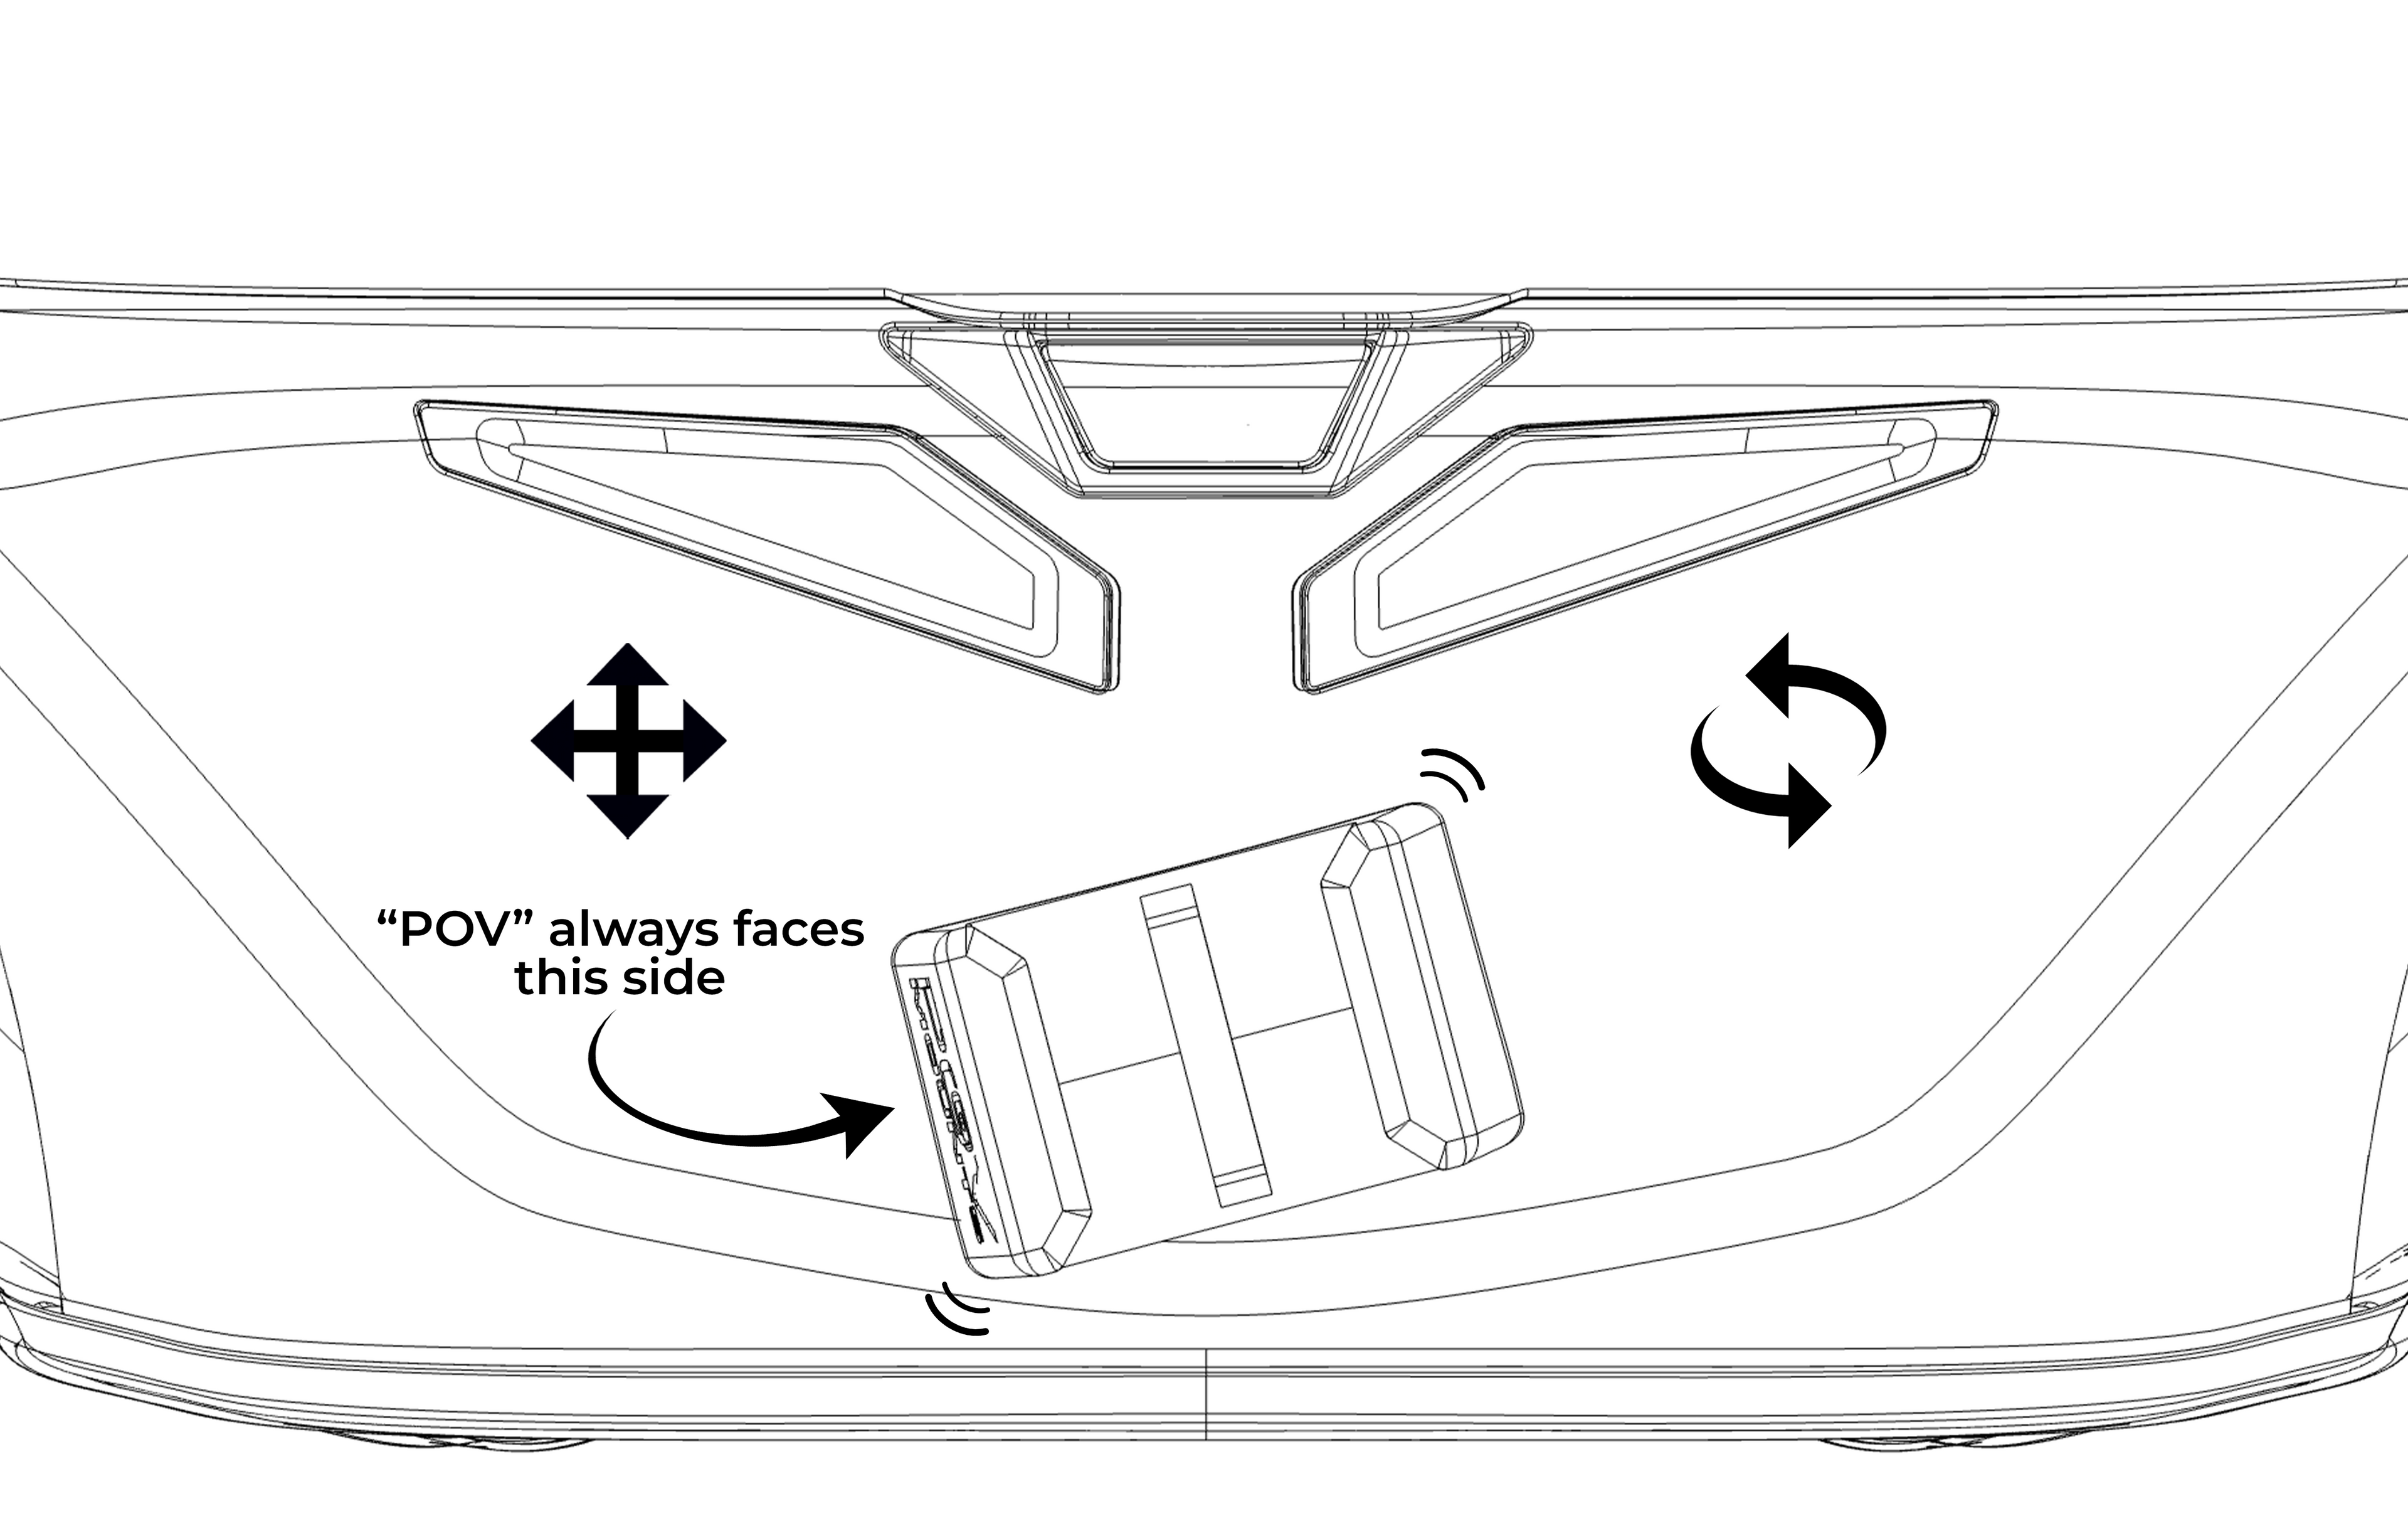
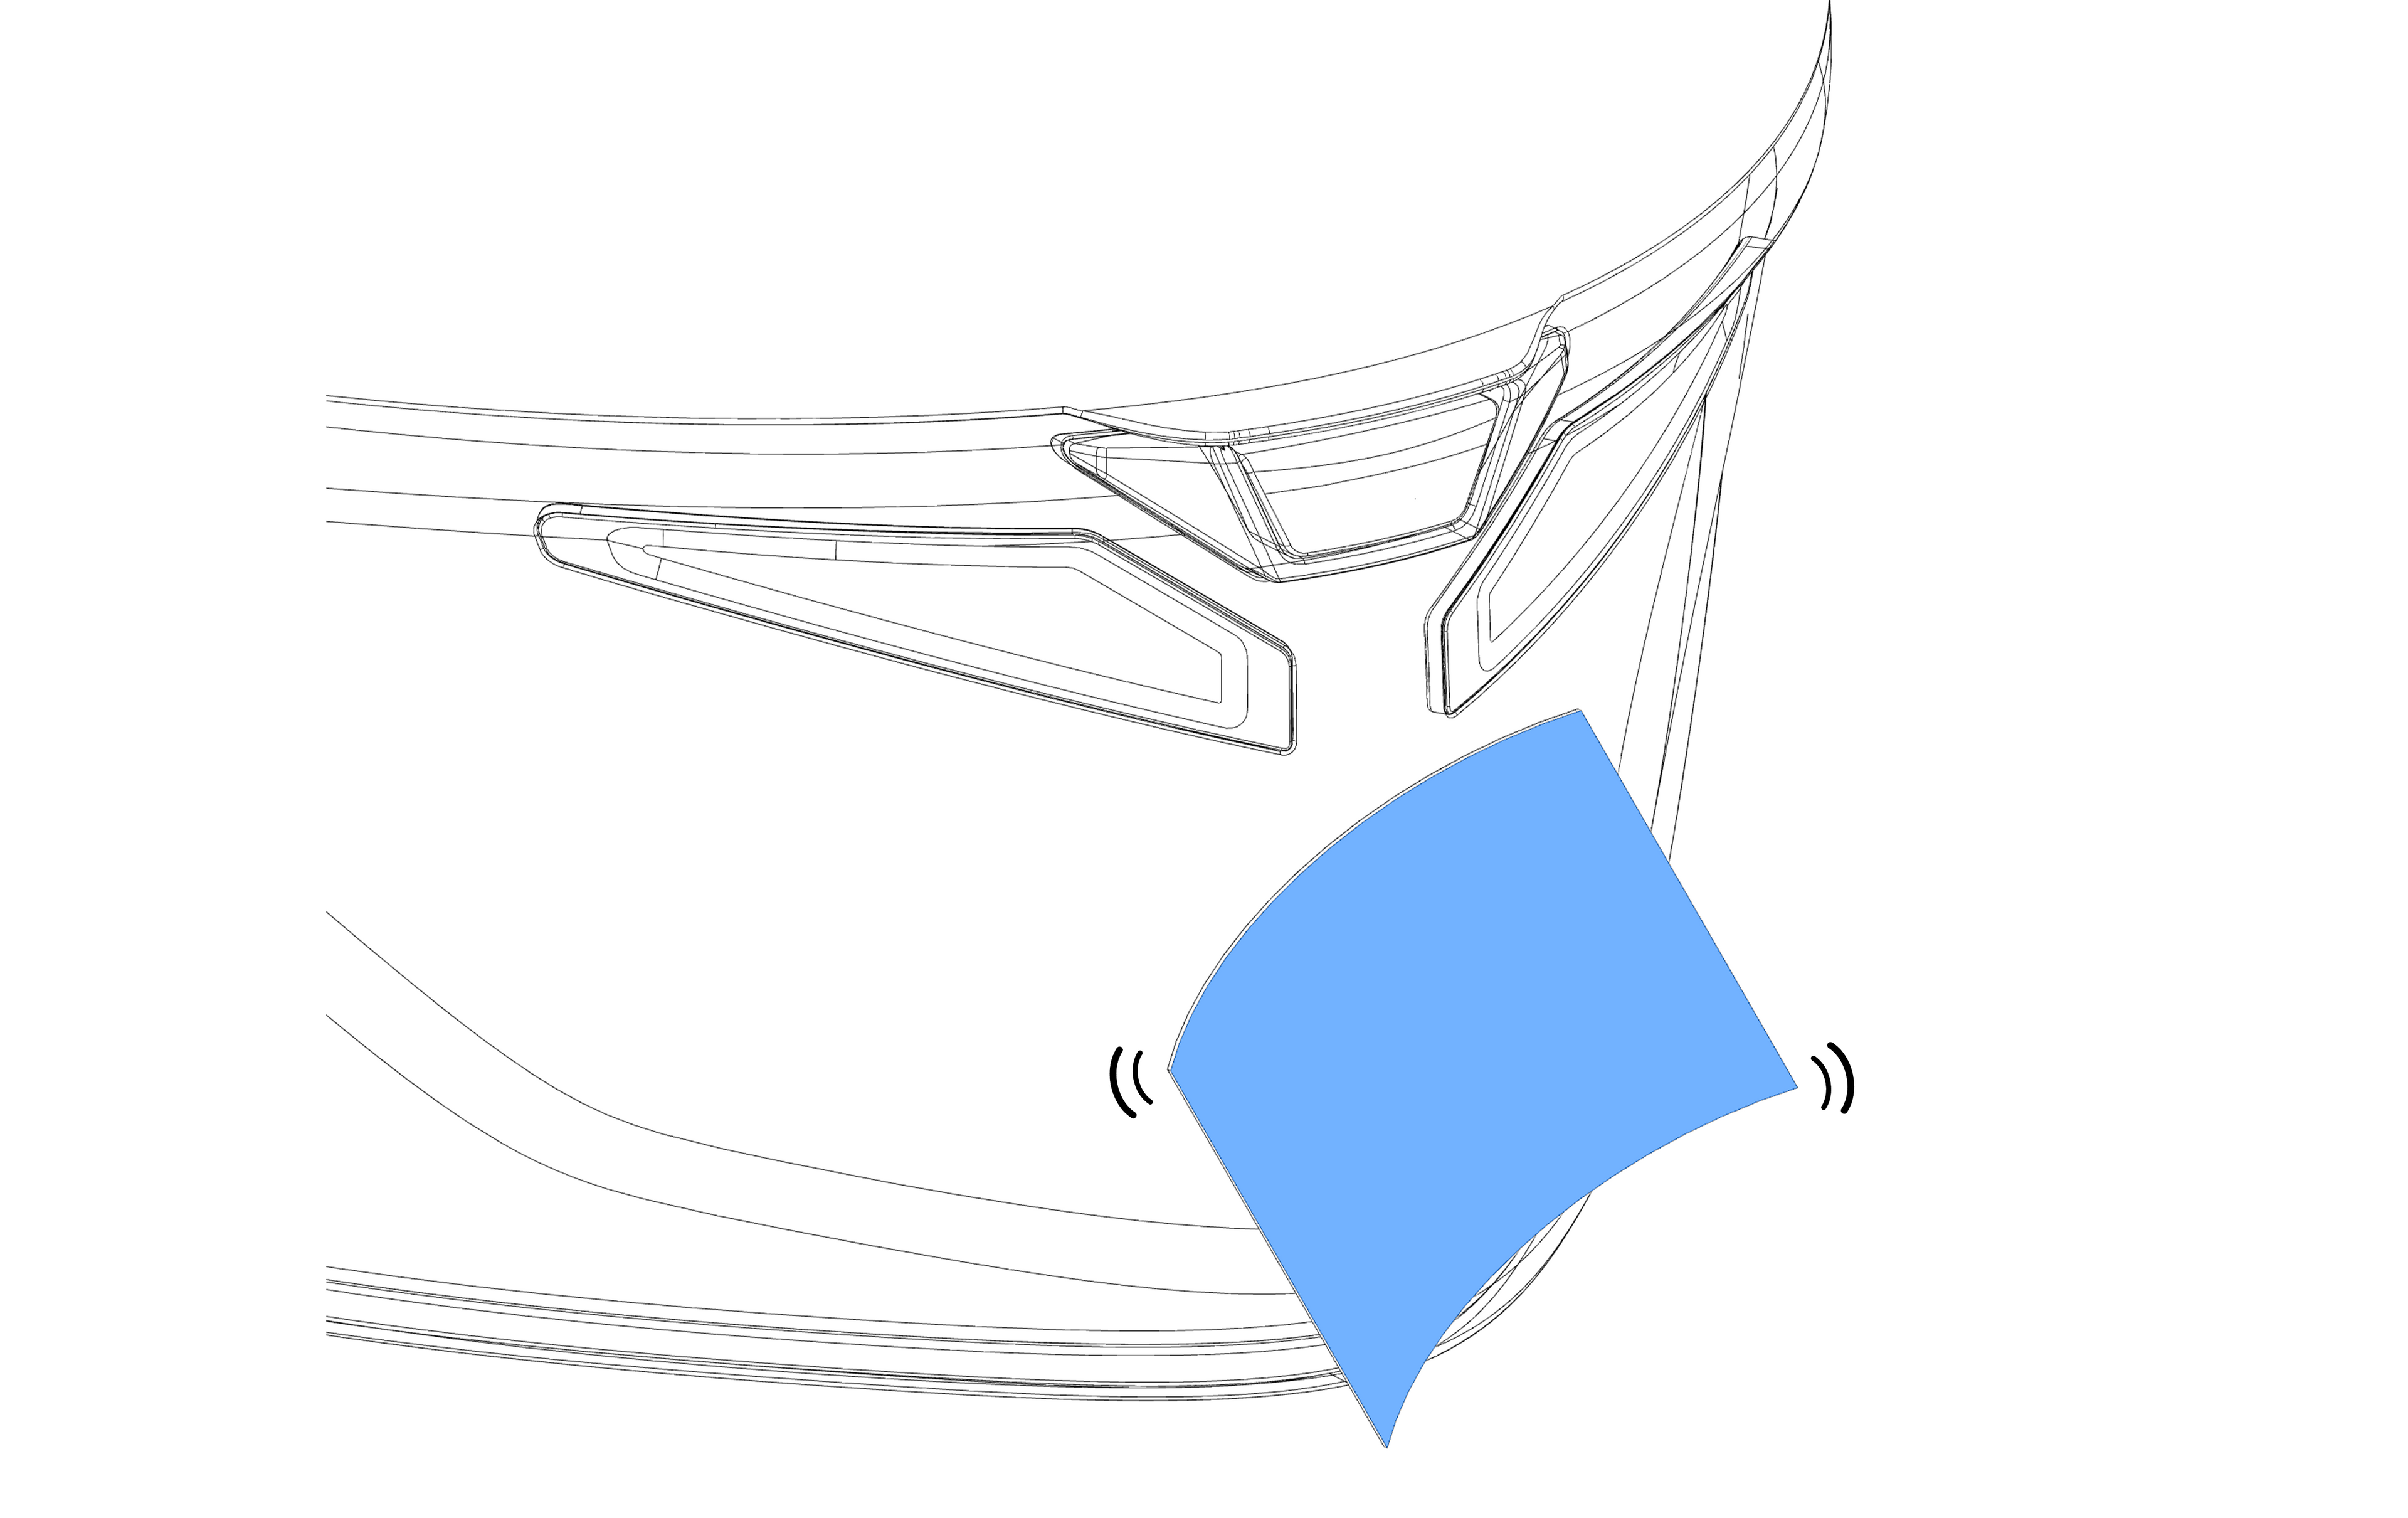
Step 1
Before proceeding with the installation, check the placement of the mount by positioning it on the chin guard of your helmet, without removing the protective film. Position the mount so the "POV" logo is visibile from the right side of the helmet. Use the product photos on our website as a reference.
⚠️ Different sizes of the same helmet may result in some variations in position compared to the photos.
✅ Make sure that the chosen position allows the perfect adaptation of the 3M™ VHB™ adhesive.
⚠️ Different sizes of the same helmet may result in some variations in position compared to the photos.
✅ Make sure that the chosen position allows the perfect adaptation of the 3M™ VHB™ adhesive.
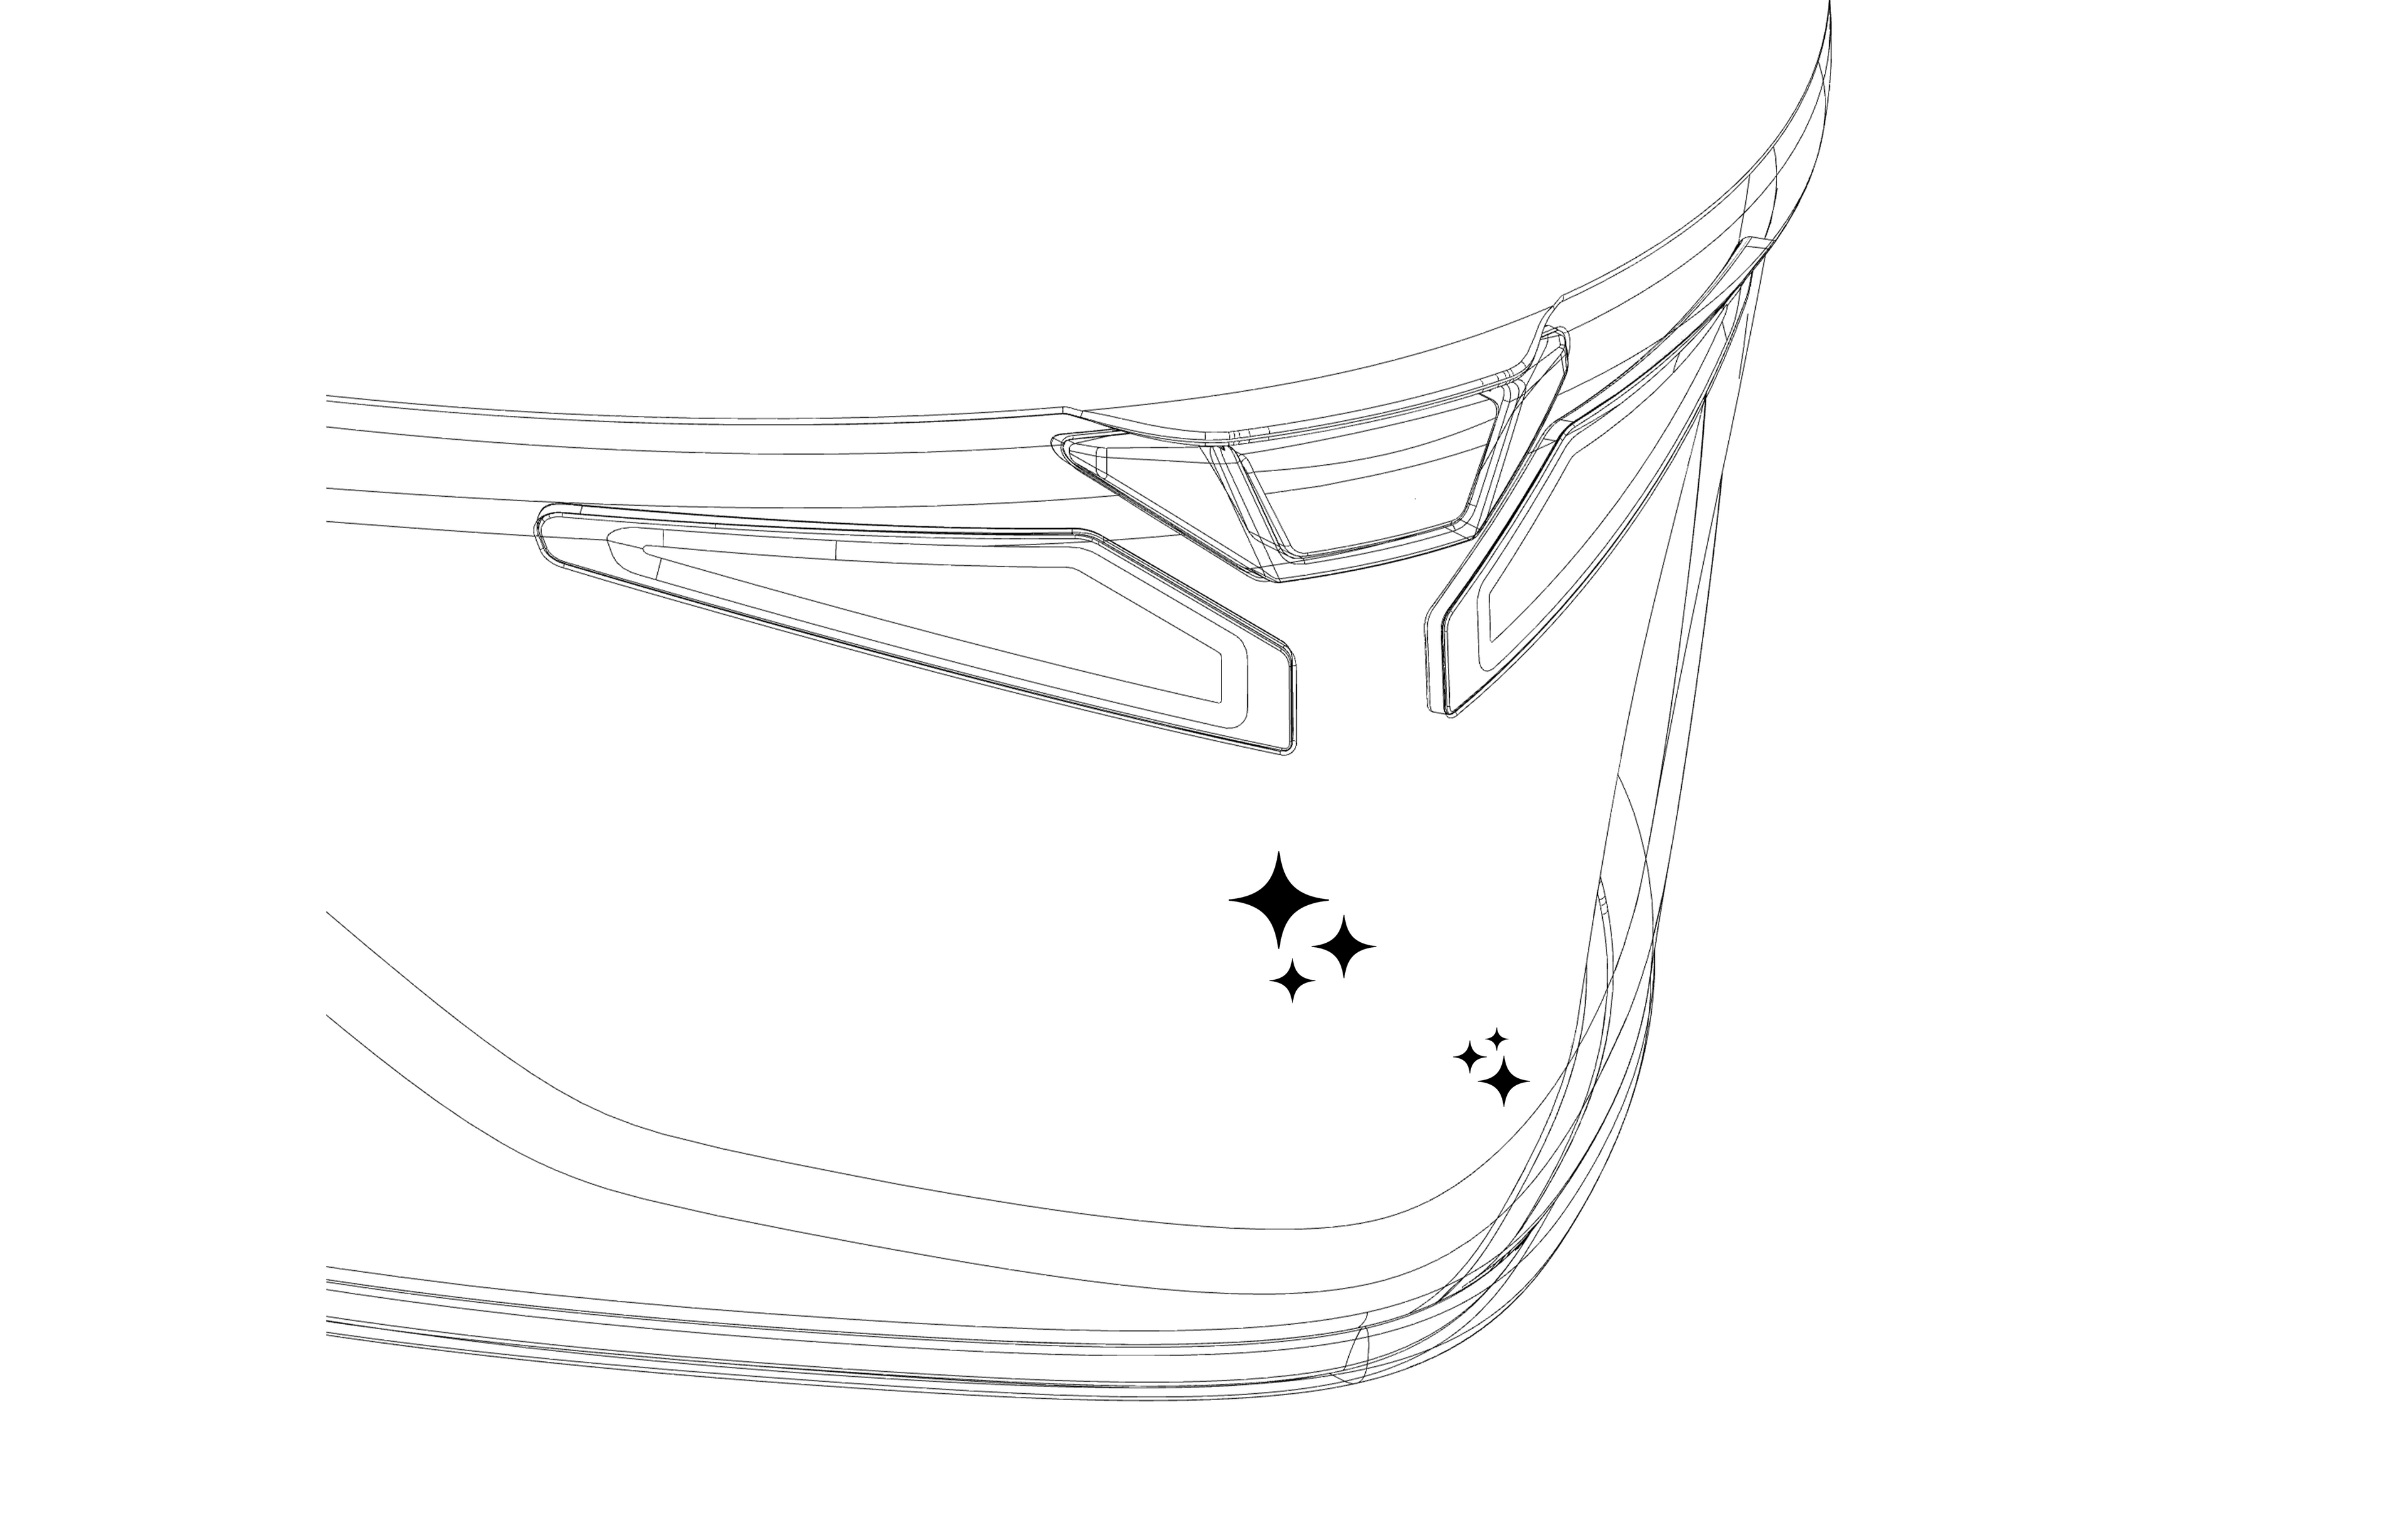
Step 2
Carefully clean the surface of the helmet chosen for the mount. Use the two-step wipes kit included in the packaging.
⚠️ Dirt residues could compromise the adhesion of the mount to the helmet.
✅ Make sure to remove all traces of dirt.
⚠️ Dirt residues could compromise the adhesion of the mount to the helmet.
✅ Make sure to remove all traces of dirt.
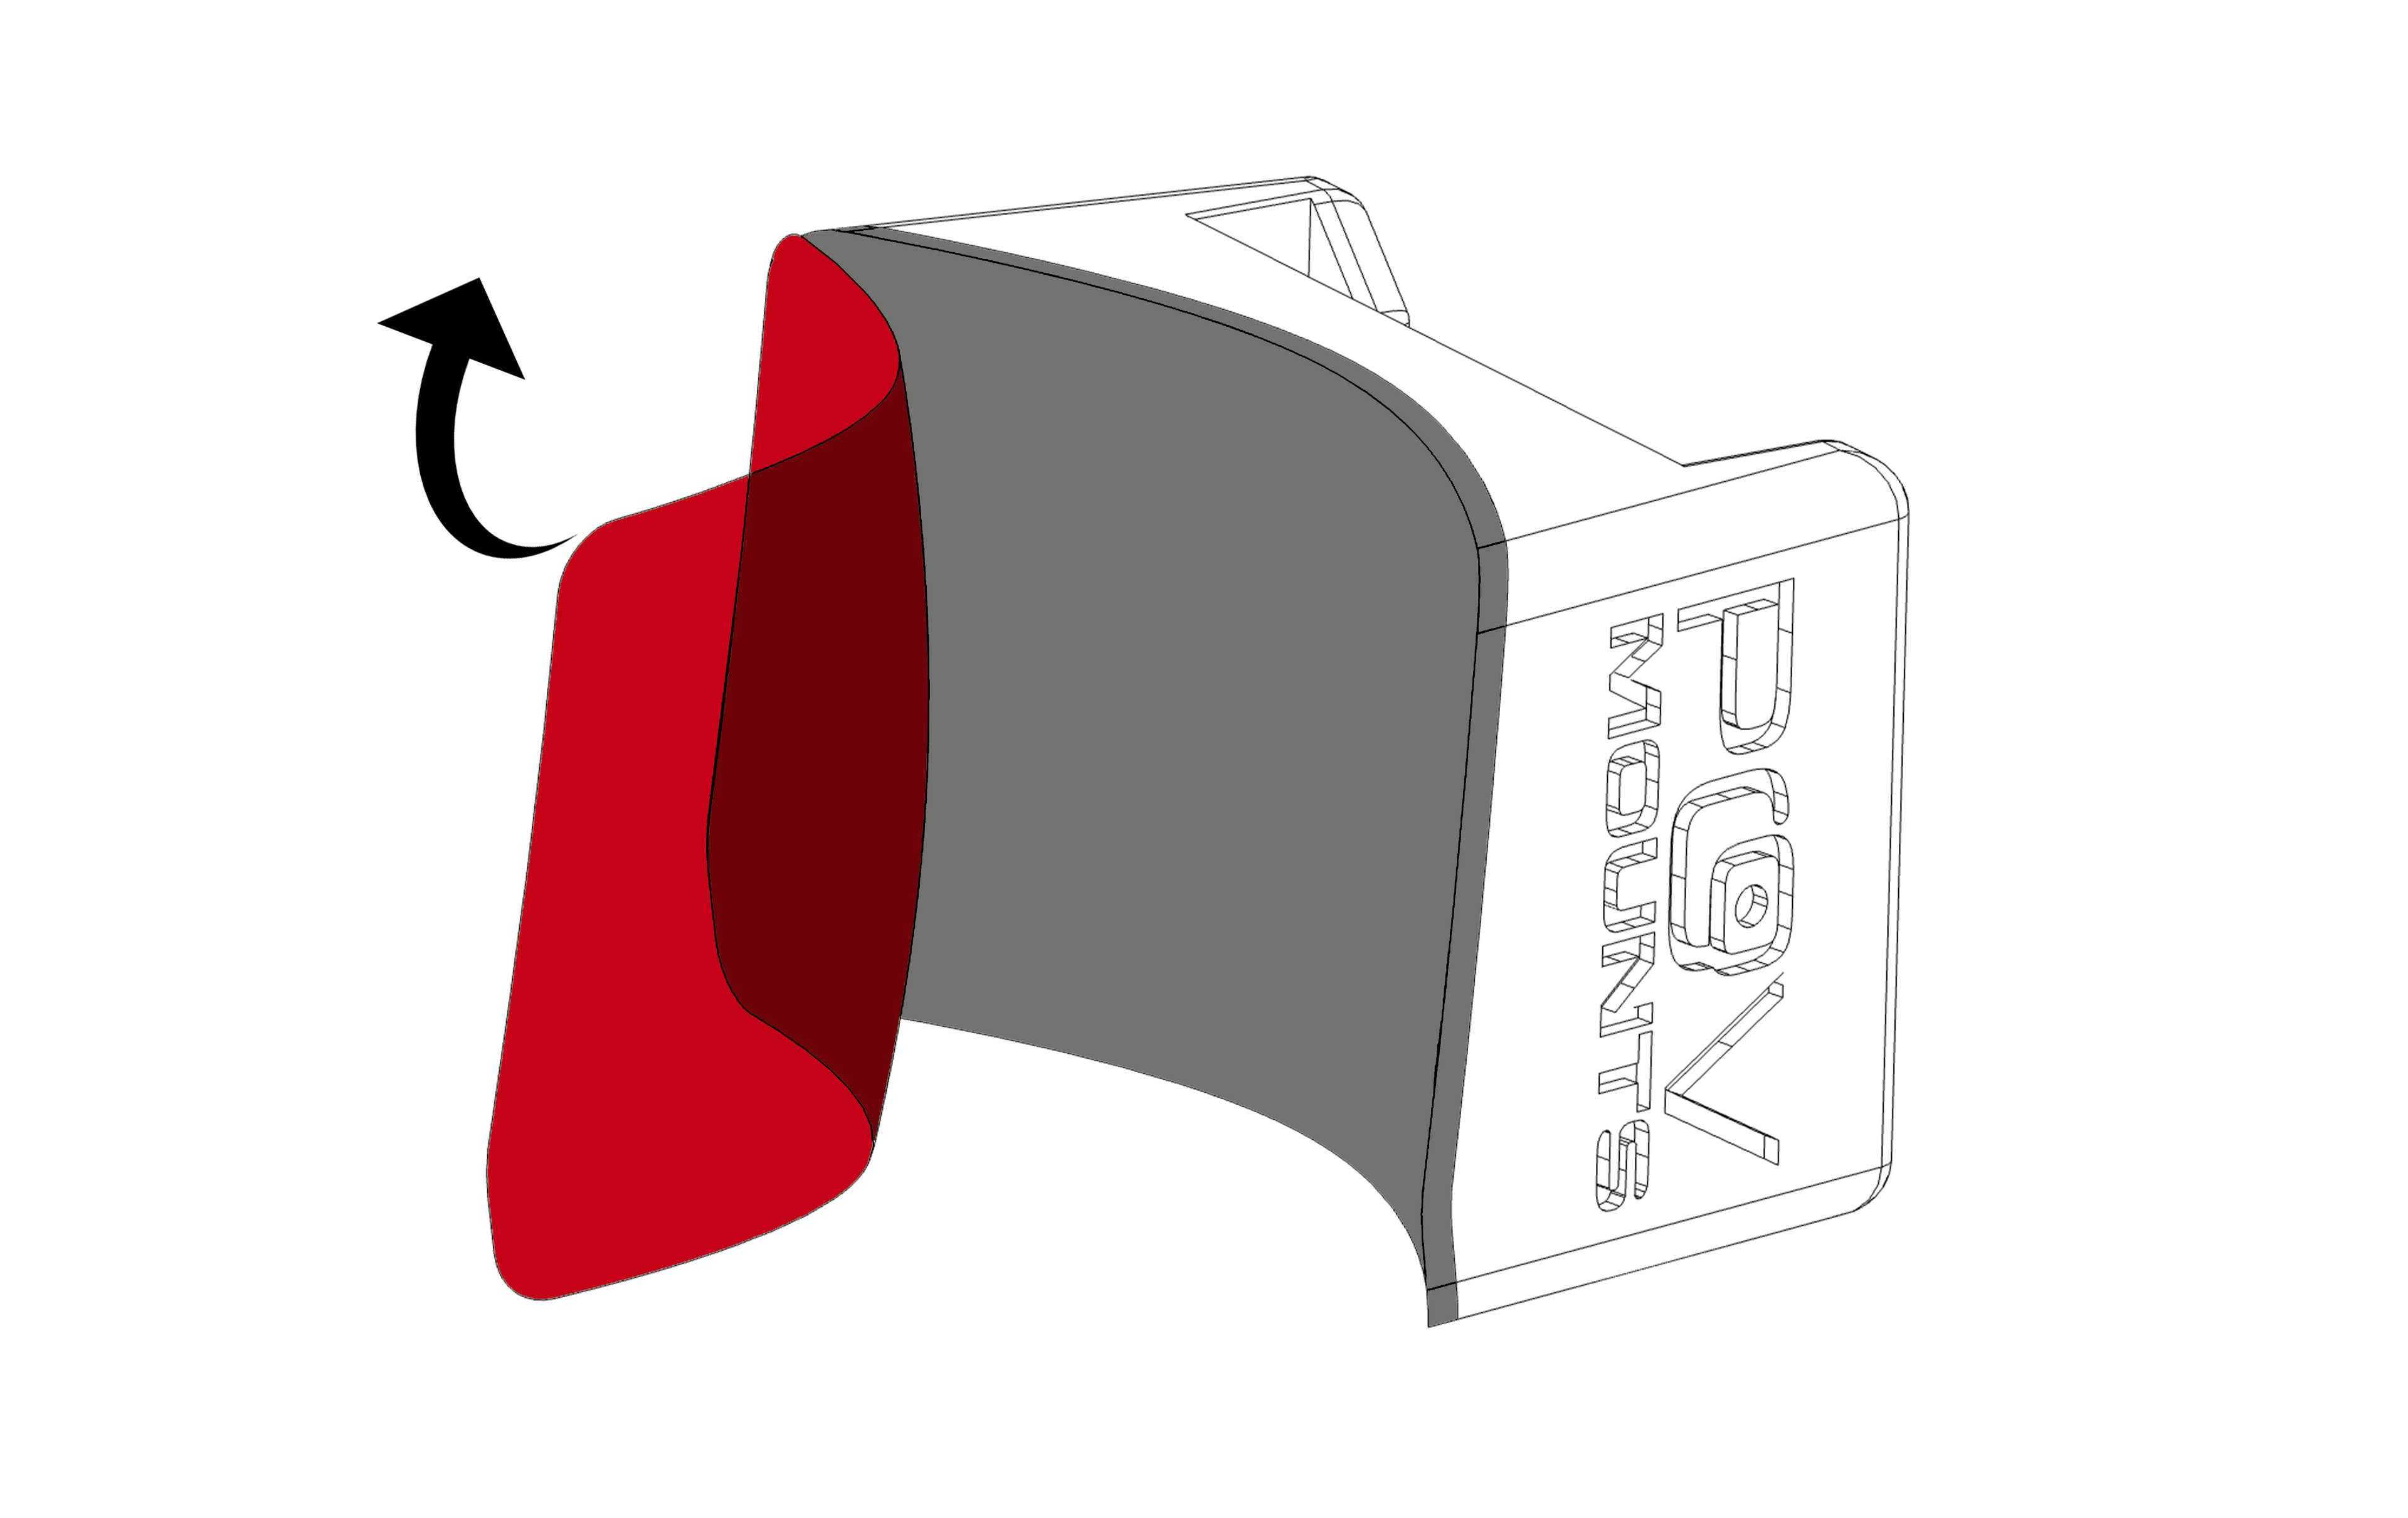
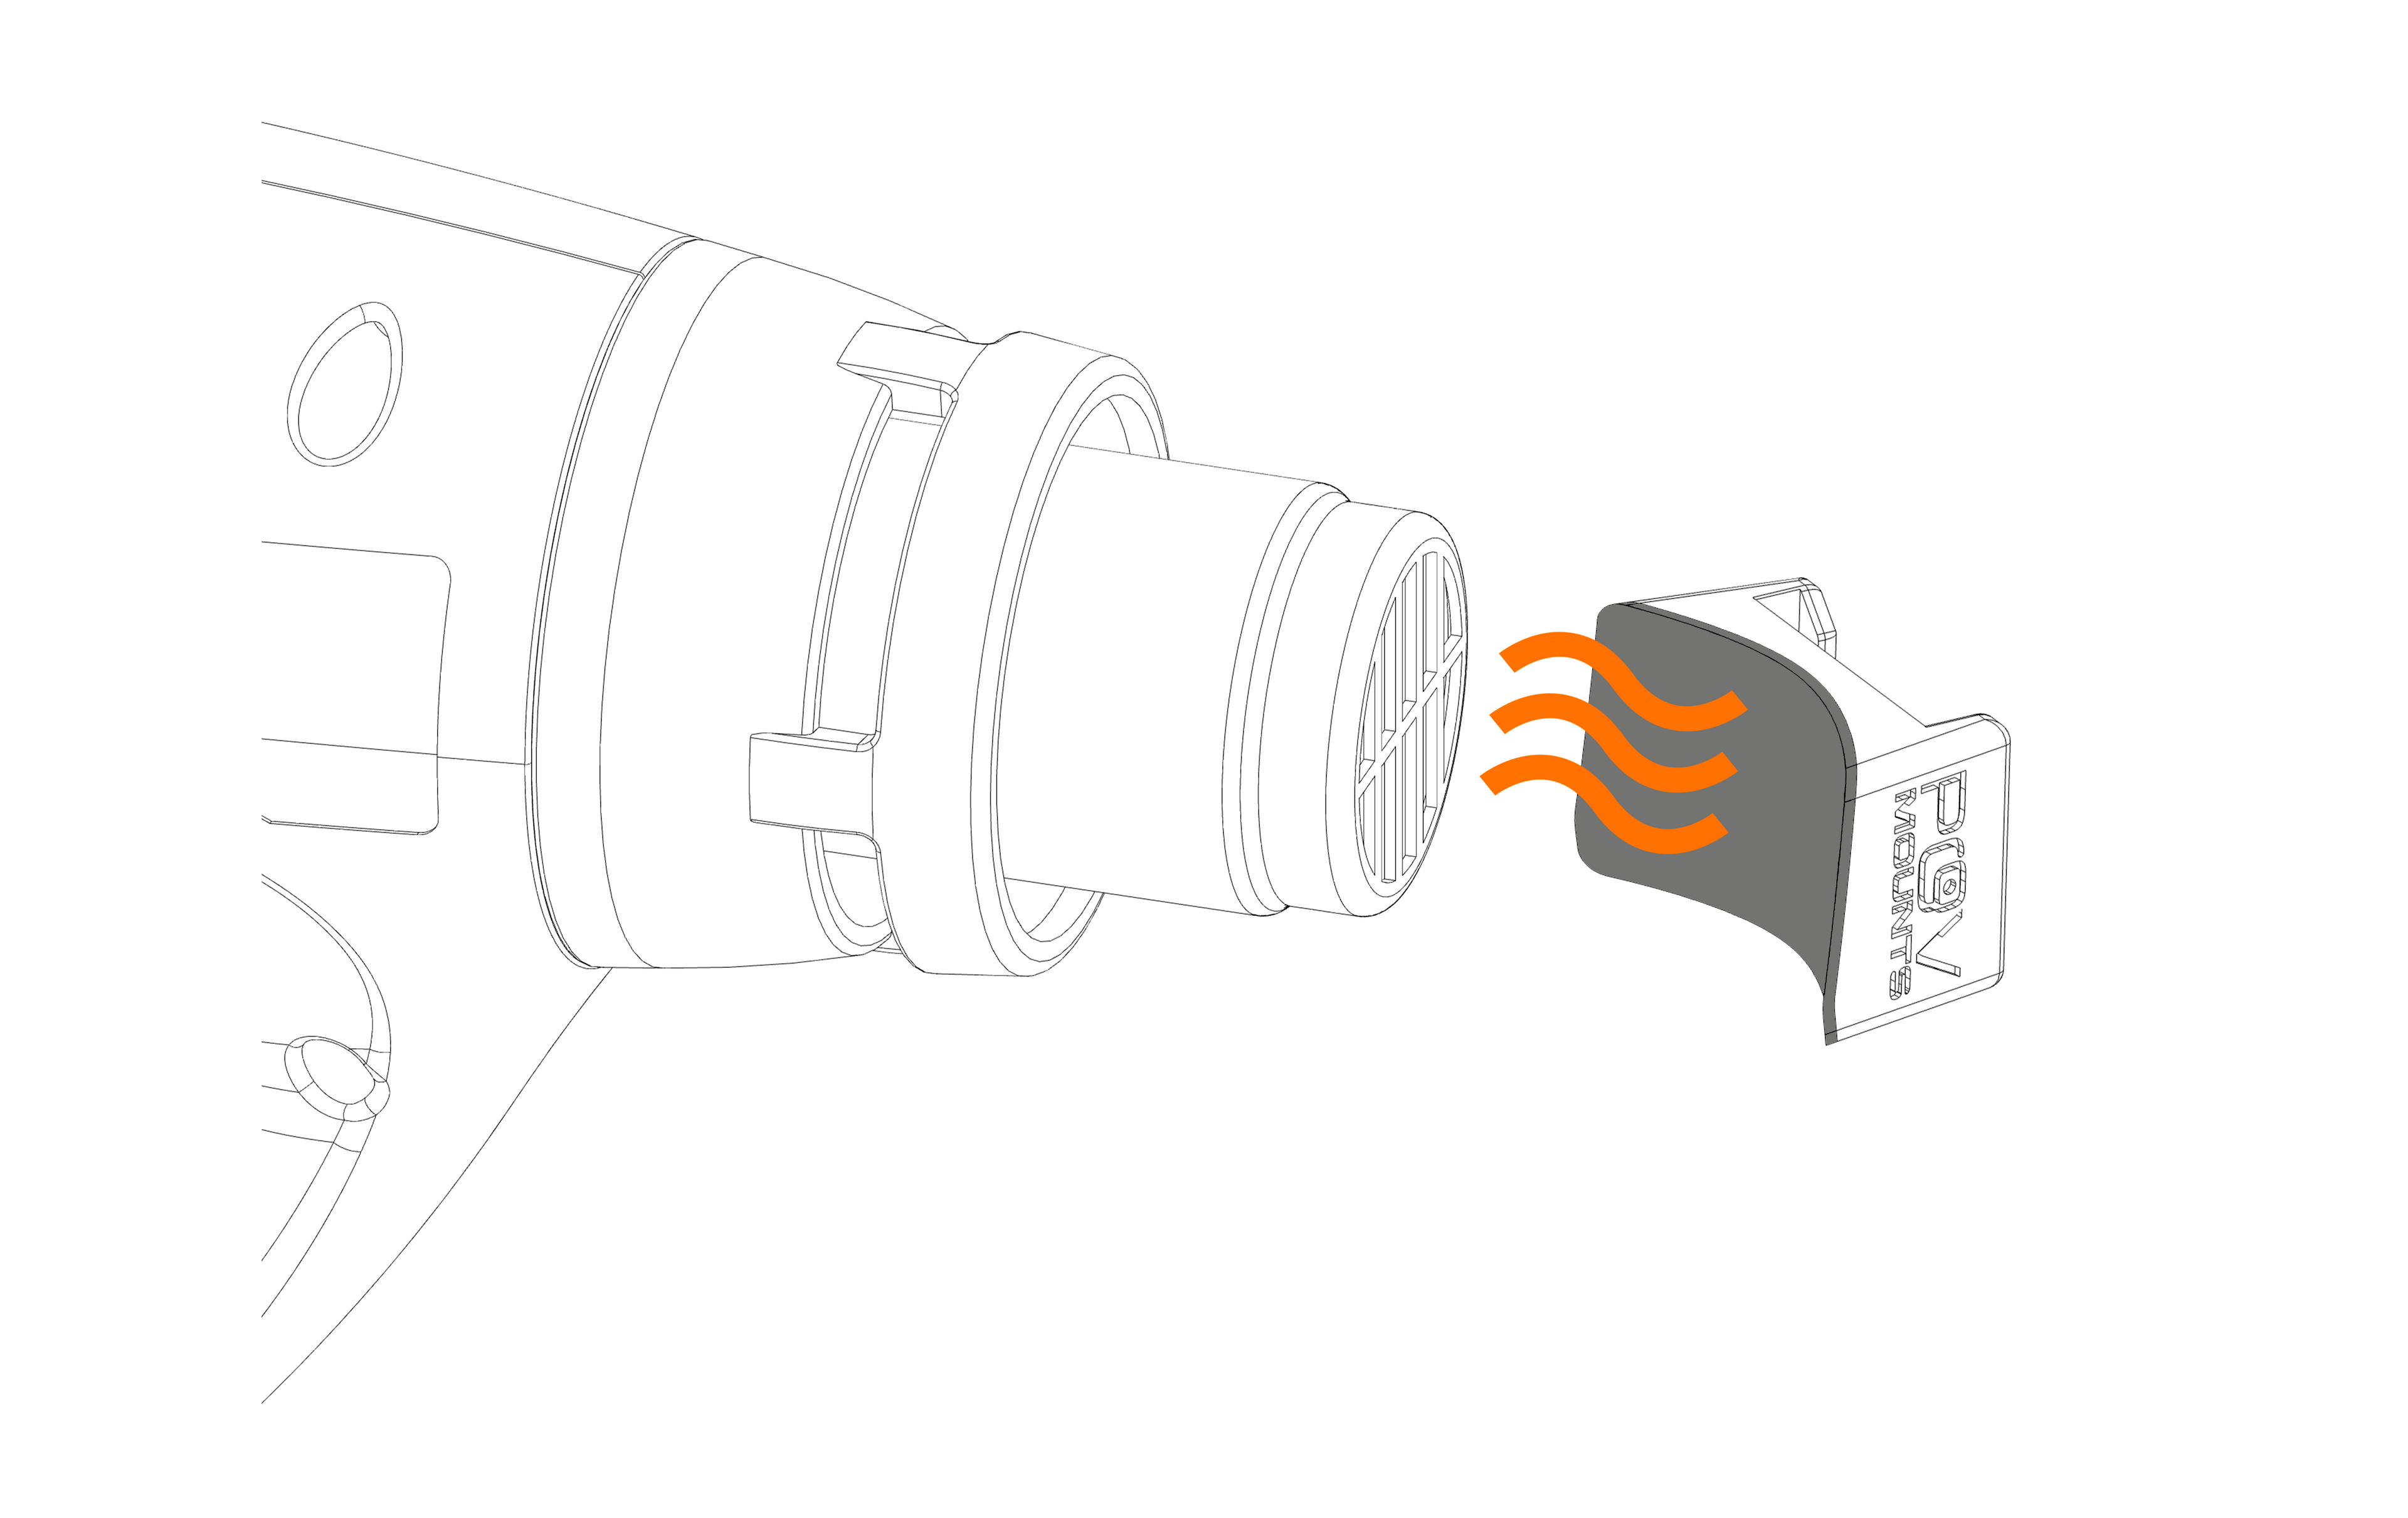
Step 3
Remove the protective film from the 3M™ VHB™ adhesive. Heat the surface of the adhesive moderately with a heat gun or, alternatively, a hairdryer.
⚠️ Applying the adhesive while cold does not guarantee its perfect adaptation to the surface of the helmet.
✅ Heat the adhesive's surface moderately to soften it, obtaining an optimal fit with the chin guard of the helmet.
⚠️ Applying the adhesive while cold does not guarantee its perfect adaptation to the surface of the helmet.
✅ Heat the adhesive's surface moderately to soften it, obtaining an optimal fit with the chin guard of the helmet.
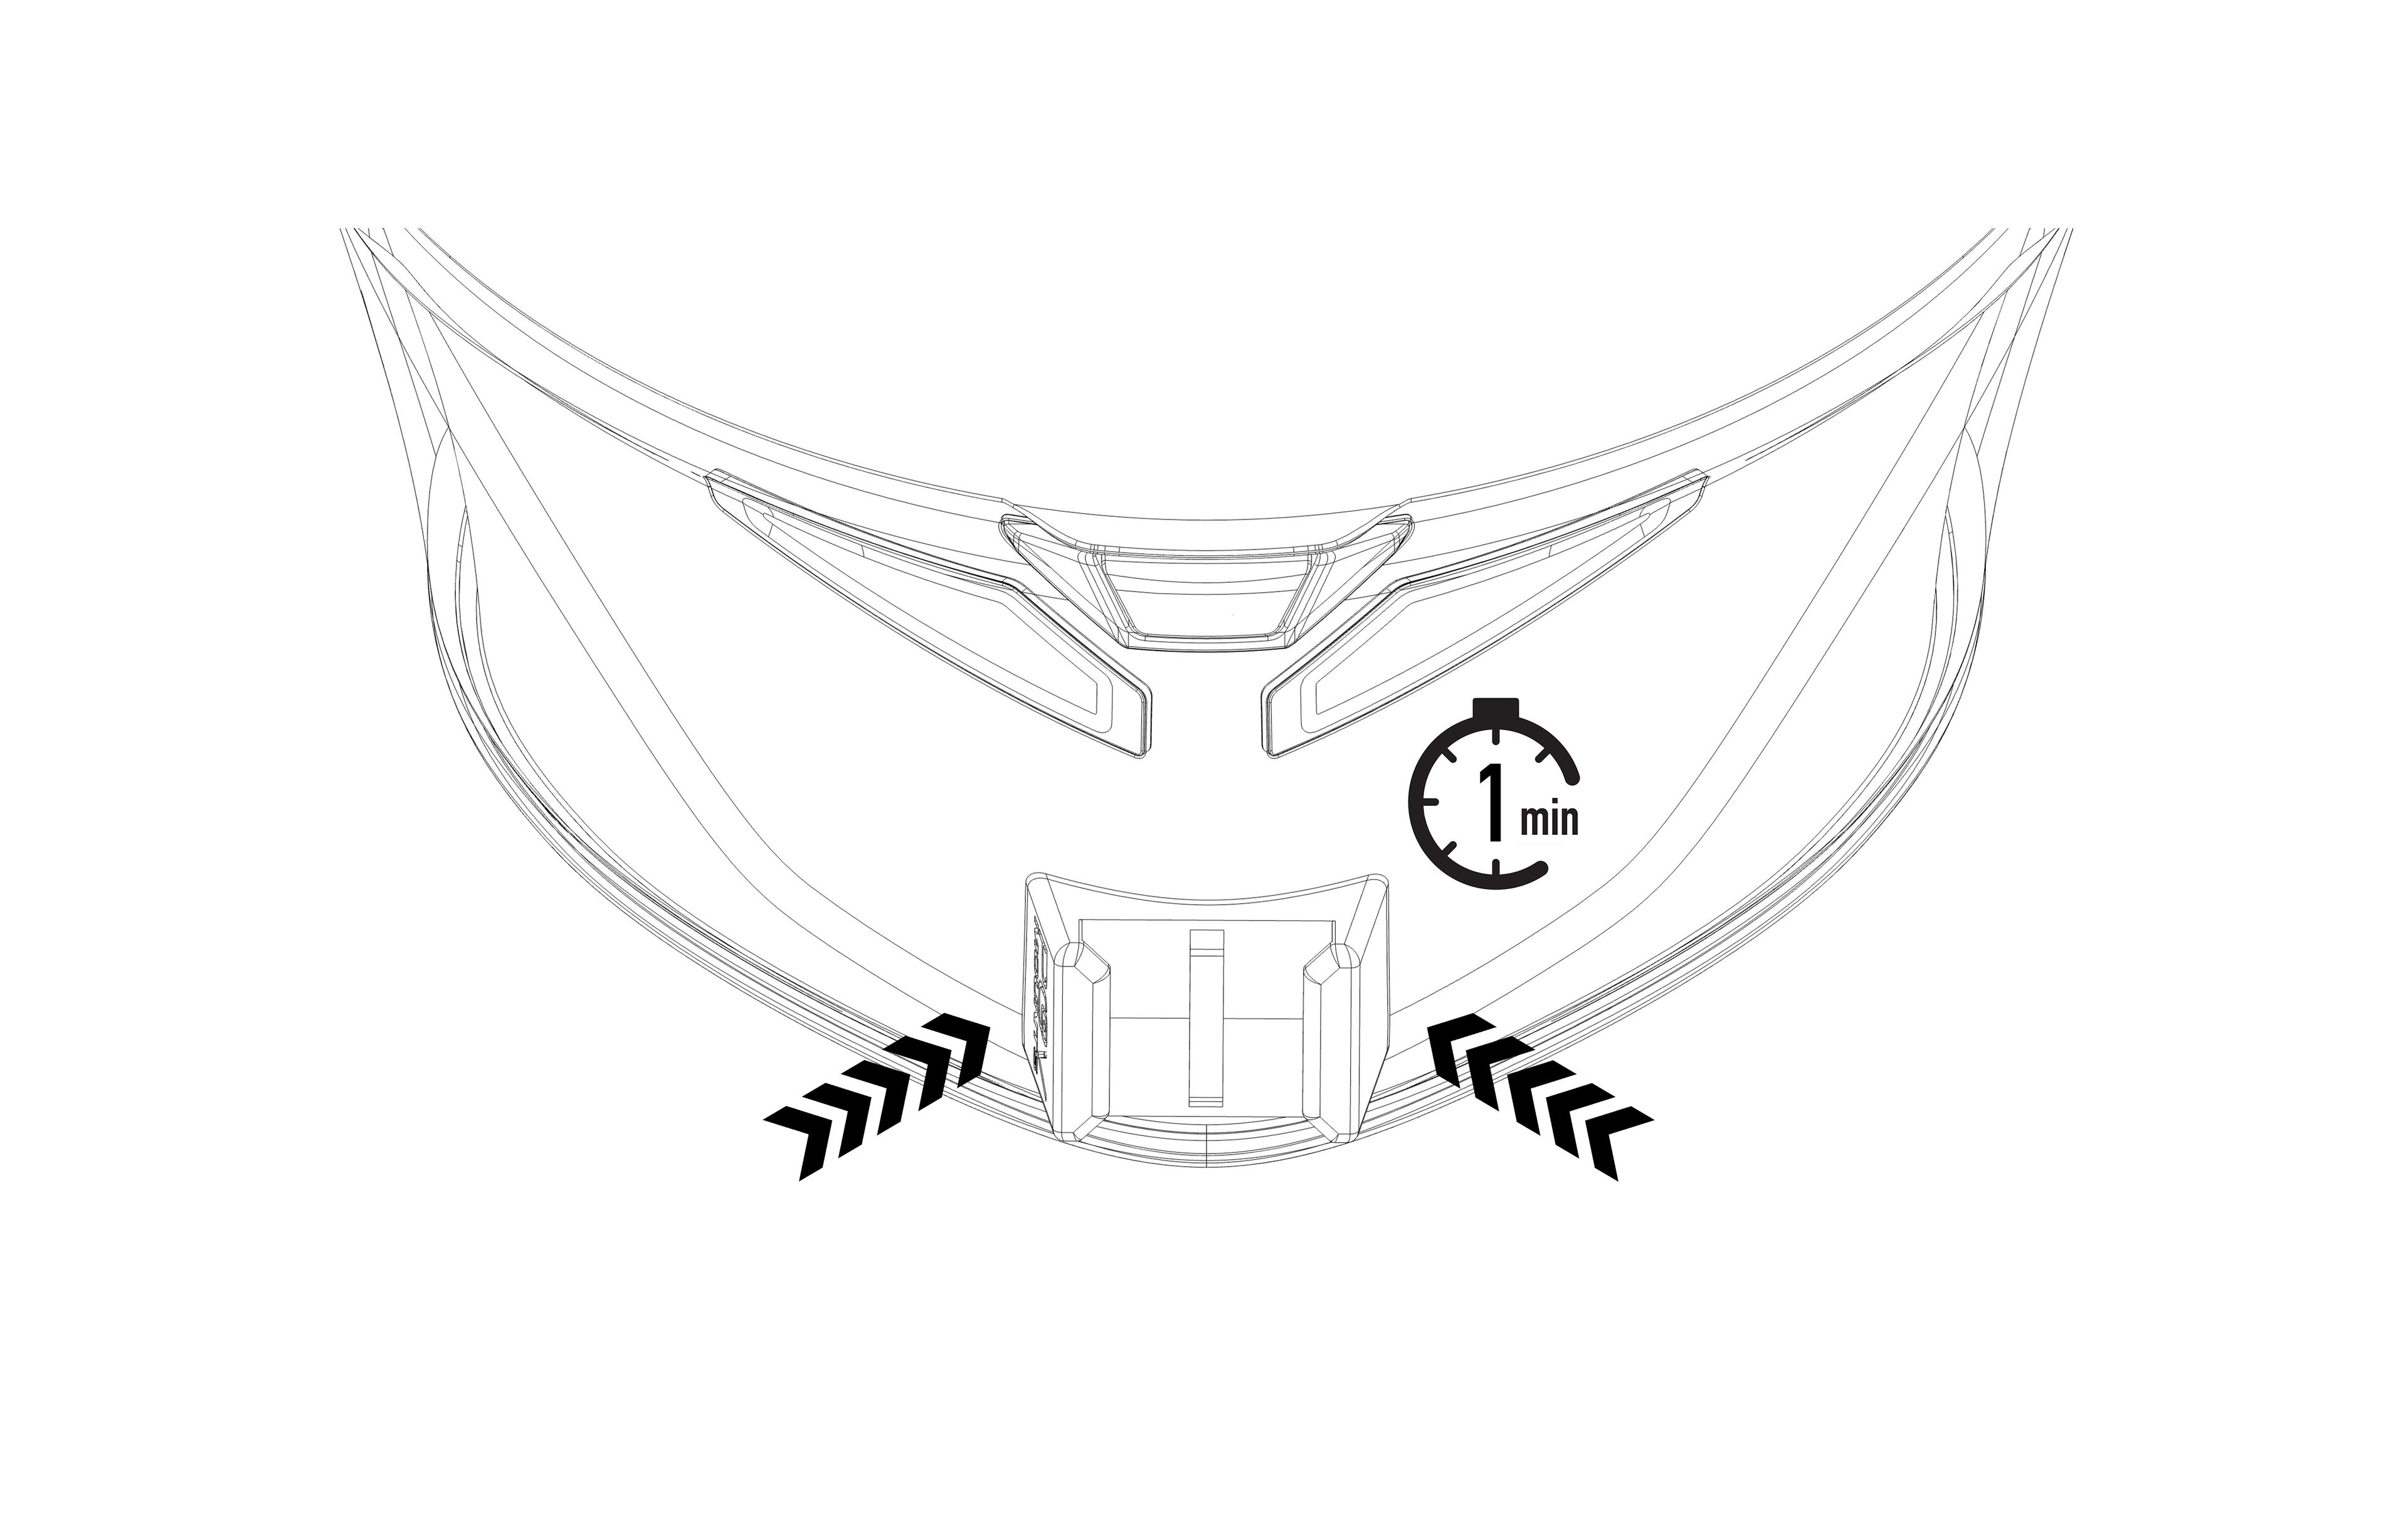
Step 4
Place the mount in the position chosen during Step 1. Once satisfied with the positioning, press firmly against the chin guard of the helmet for 1 minute.
⚠️ Once pressure has been applied, it will no longer be possible to reposition the mount.
✅ Place the mount lightly and, once satisfied with the position, apply pressure for 1 minute.
⚠️ Once pressure has been applied, it will no longer be possible to reposition the mount.
✅ Place the mount lightly and, once satisfied with the position, apply pressure for 1 minute.
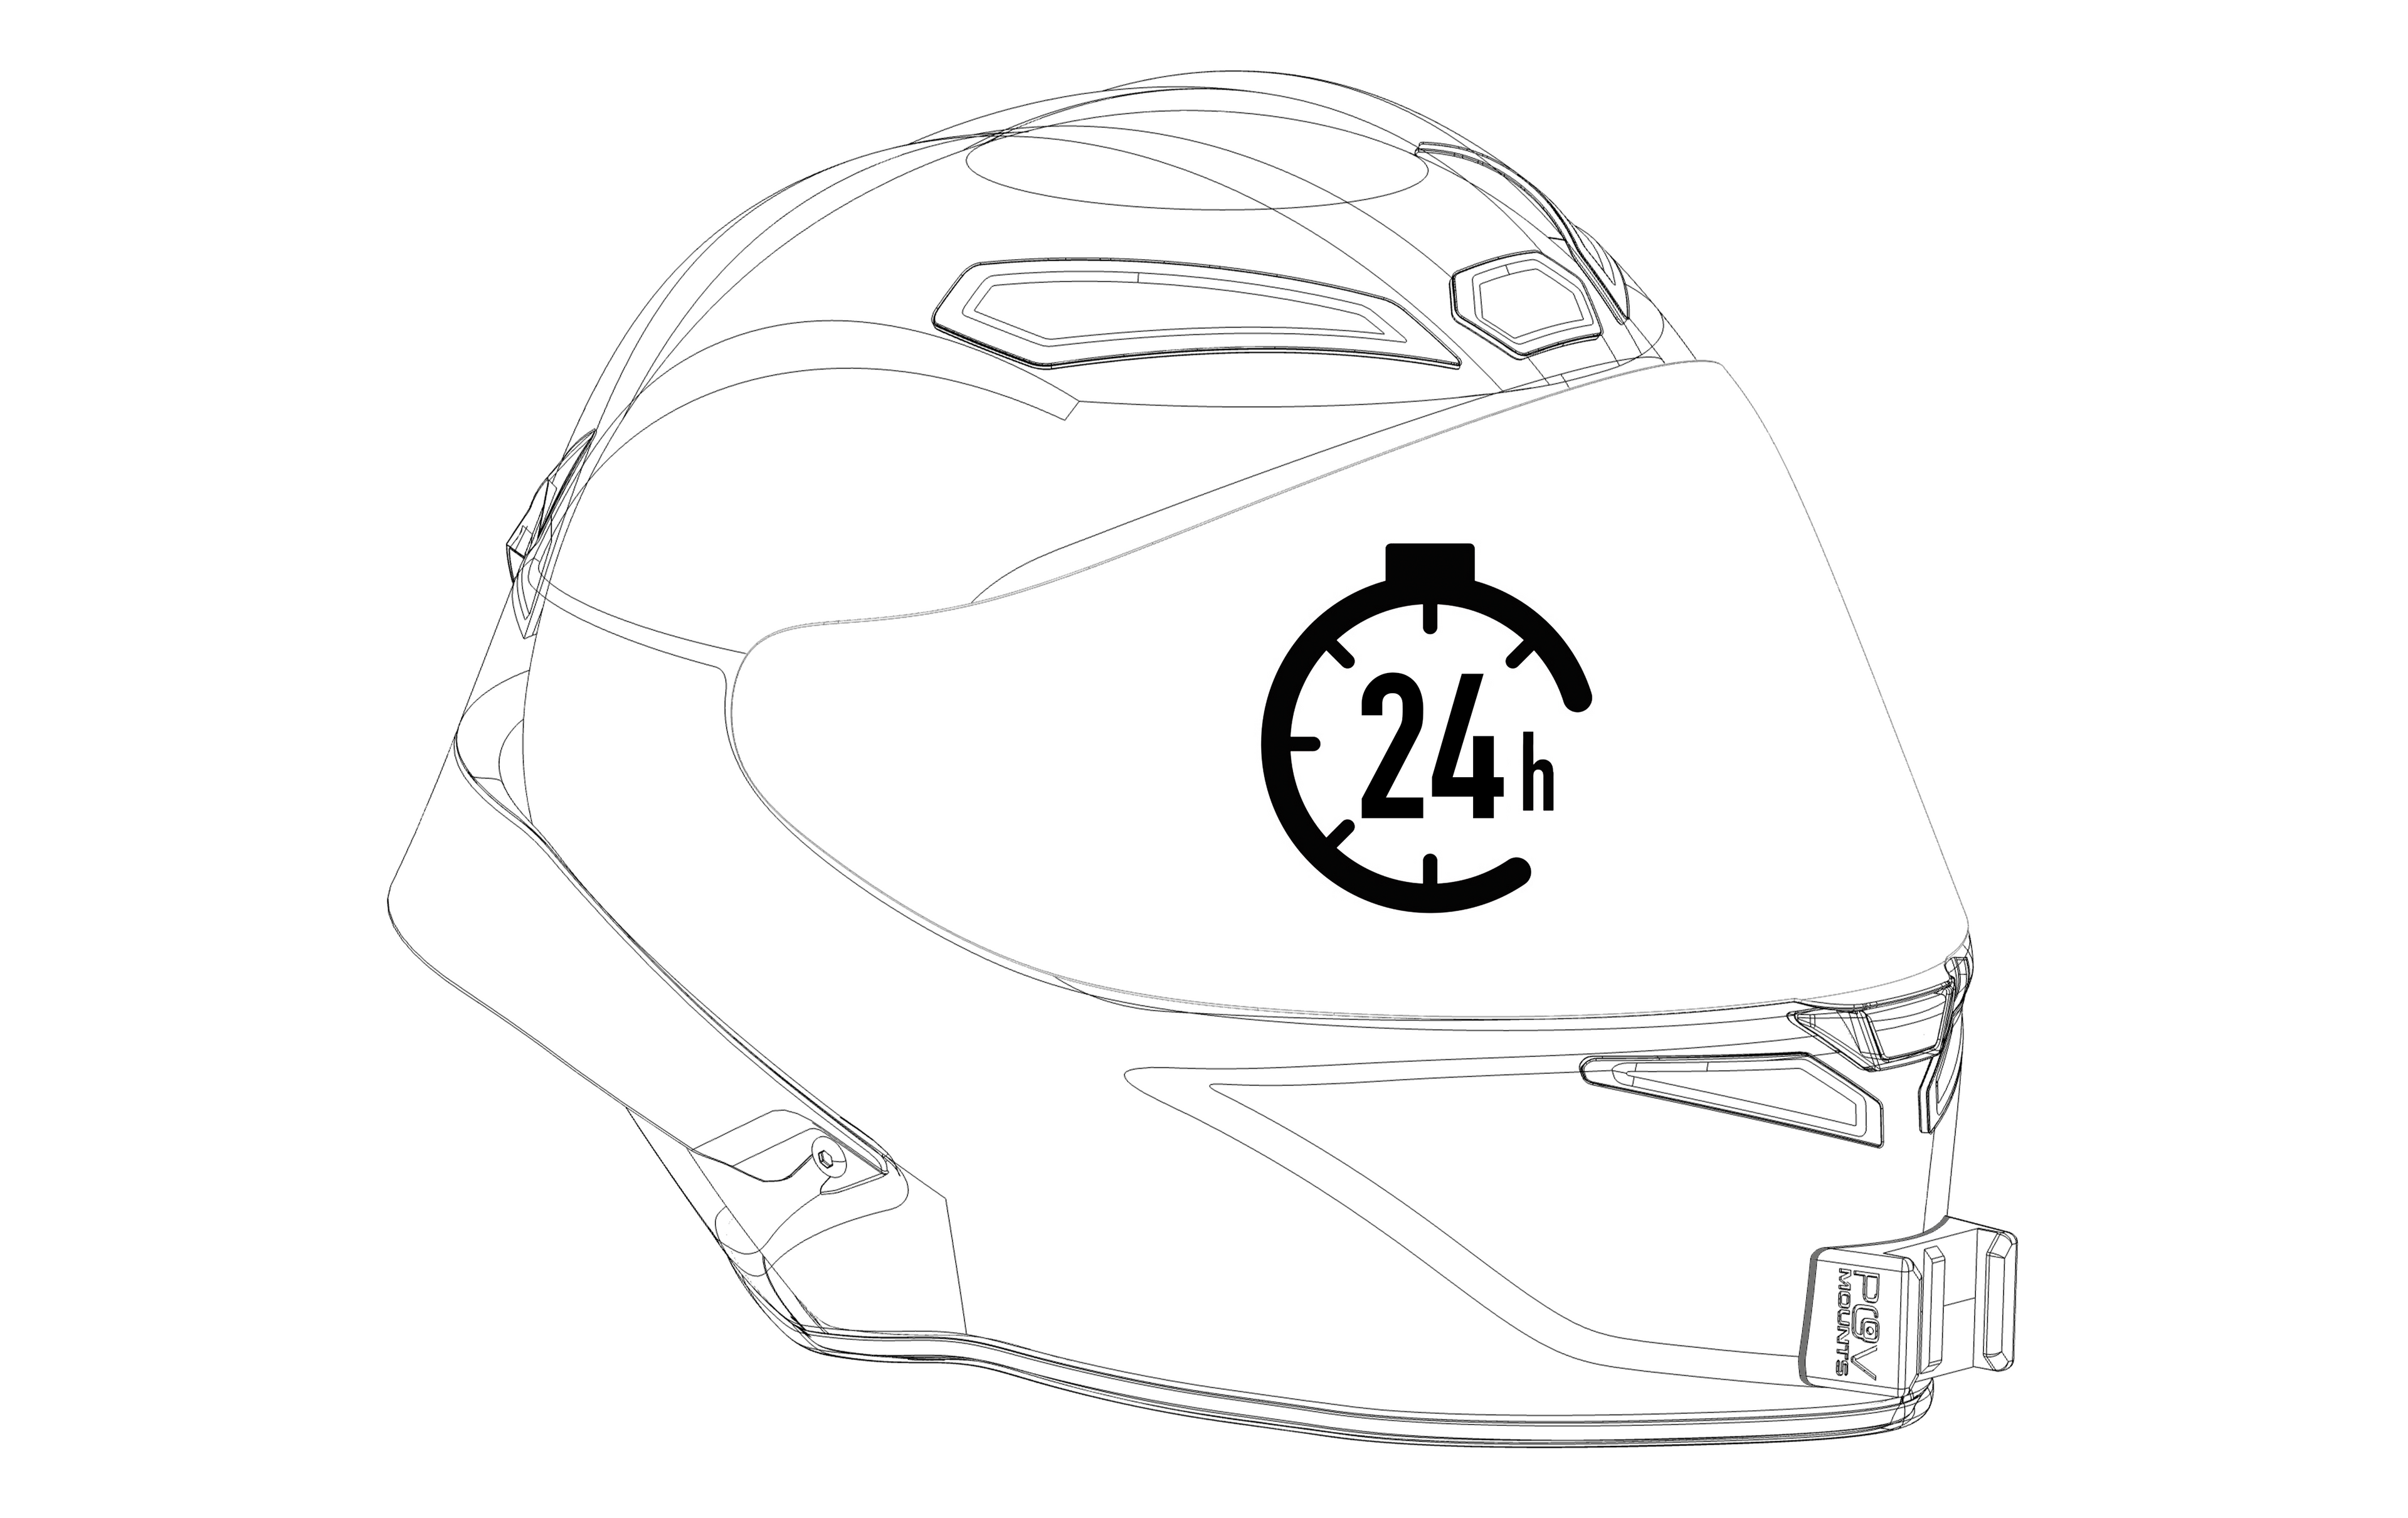
Step 5
Wait at least 24 hours before using the mount.
⚠️ Using the mount before the 24hrs period could compromise its adhesion to the helmet.
✅ Allow the adhesive to complete its setting time. You can regularly use your helmet during the 24 hour period without attaching your action camera.
⚠️ Using the mount before the 24hrs period could compromise its adhesion to the helmet.
✅ Allow the adhesive to complete its setting time. You can regularly use your helmet during the 24 hour period without attaching your action camera.